For years now, wet rooms have been a popular choice when it comes to bathroom design. Luxurious and sleek, wet rooms offer a bit of a spa feel in the comfort of your own home. The easy flow from one side of the room to the other creates a feeling of spaciousness and is a great choice especially for smaller shower rooms.
As with any tiling project, it’s important to plan your wet room carefully and make sure you follow all the right steps and preparation to ensure you create something that will last and stand the test of time. If not, you risk the possibility of very expensive repairs further down the line!
We’ve spoken to our in-house experts here at CTD Tiles and asked them to provide their top tips for designing and tiling a wet room. Read on for all you need to know!
Is a wet room more expensive than a normal bathroom?
As there is a bit more involved in creating a wet room than a normal bathroom, they do tend to be slightly more expensive. This is of course dependent on any structural alterations that need to be taken into consideration. The floor is the most important part of a successful wet room design, especially when it comes to planning drainage, and so it’s important to consider this as it may end up costing you a bit more to ensure the room is exactly how it needs to be.
Measure your floor space
The first thing you need to do is plan out your room. The main part of this is deciding where your shower area and most importantly your shower tray section is going to be. From there you should also plan where your sanitaryware, furniture and WC will be placed, as well as a radiator if you choose to have one.
When planning your room, consider where your drainage and plumbing points are. If you’re renovating an existing bathroom, it will save you a lot of time and money to have your new fixtures and fittings in a similar place to the old ones, or as near as you can.
We recommend measuring out the floor space and putting pencil to paper so that you can plan it all carefully before you get started.
Plan your shower design
Think about the design of the whole space - is your shower area going to be screened off with glass, behind a wall or is the whole room going to be open plan? These are important questions you’ll need to answer in the beginning stages.
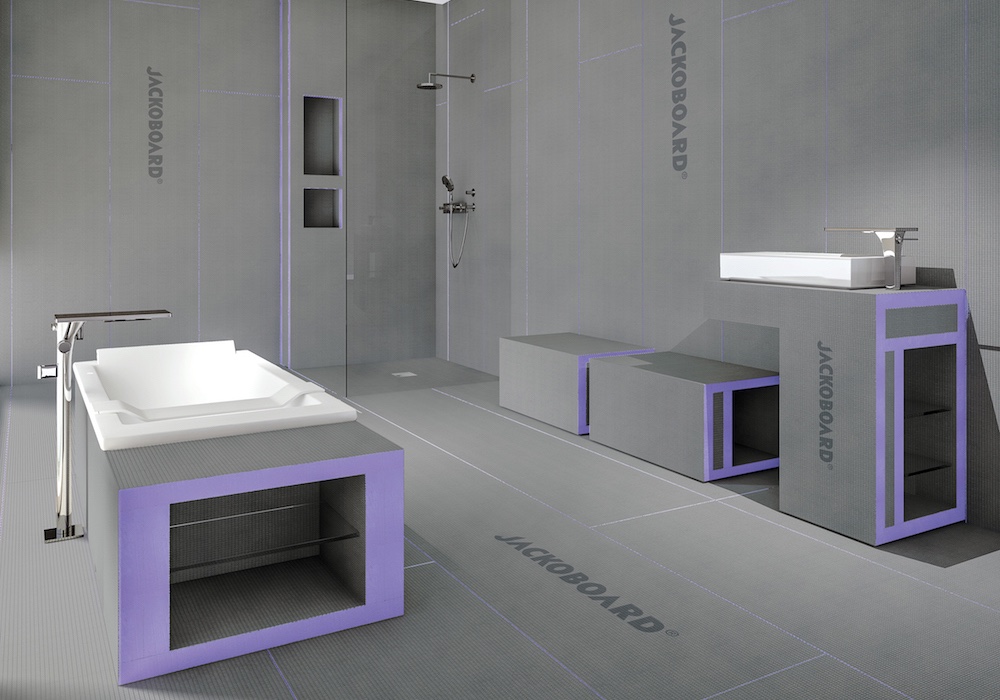
If you have the luxury of space, you may want to consider any built-in seats in the shower area - construction boards can be used to build bespoke areas to tile on top of to create a truly luxurious walk-in shower experience. Think about any niches or boxing in that might need to be factored in as well.
How do you want to heat your wet room?
Underfloor heating is the ideal heating solution for a wet room. Not only will it keep the room feeling lovely and warm underfoot (also drying the floor faster), it can also negate the need for radiators or heated towel rails completely.
This will free up more space for other design elements and is especially important if you’re working with a more compact area as it could save you valuable wall space.
It’s important to make your decision on your heating before you start as it will need to be factored not only into your spatial planning but also in the tiling of your floor.
Choosing your wet room tiles
In barefoot wet areas,
tiles with anti-slip properties (a slip rating of R12 or above) are highly recommended to avoid injury due to slippery surfaces.
Mosaic tiles are often used on wet room floors as the increased amount of grout lines add extra slip resistance. Or, you can choose a tile with a slightly structured, textured surface to provide additional grip.
Design features to consider for your wet room
In addition to any built-in seating and niches, the overall finish of the wet room needs to be thought out. From lighting, grout colour, style of drain to what kind of shower you are going to choose - standard or rainfall? It’s vital to decide on everything, from top to bottom, before you get started.
Installing your wet room
As already mentioned, the floor is the most important part of a wet room. All areas exposed to water should be made watertight using waterproof membranes, matting and sealing tape.
After you have measured out your room, you will need to cut your waterproof boards to the correct sizes and mark where the shower tray is going to be.
The main part to focus on is the shower tray and draining area. To ensure proper drainage you will need to see which way the joists are running in the floorboards and figure out where the drain pipe will be fitted.
When you have found the floor joists, you will need to cut up to one of them to mark the edge of your shower tray position, you will then need to cut and remove the floor within this marked area - this is where your shower tray will be.
Once you have sorted your pipes and sealed everything, you can cover the area with some plywood or suitable floorboards.
Tiling your wet room floor
Tiles in the shower area floor should slope down towards the drain to help water drain away properly. Tiles can be installed on top of a ready-made sloping shower tray for added waterproof security.
Around the corners of your room, you will need to make sure the room is ‘tanked’ before installing your tiling.
You can do this by applying flexible tile adhesive along the edges of all the walls where they meet the floor. In the corners, apply joining tape to create a watertight seal. Once you have placed the tape, you can apply a small amount of tiling adhesive to set them in place.
It goes without saying that your chosen
adhesive will need to be suitable for wet areas.
Now is the time to install the underfloor heating if you are planning to. For advice on installing underfloor heating in a bathroom or wet room, have a read of our other helpful
articles.
Once your underfloor heating is installed you can begin your overall tiling process. Start by tiling and setting the correct height alongside the drain in the shower. Once the height has been marked, you can begin to tile onto the sloping gradient of the shower tray. To tile into the sloping shape, you will need to cut your tiles into a gradient, triangular format. Just make sure everything is smooth and level in the joins.
When you move onto the flooring area outside of the shower tray, it is vital to ensure the floor is level all the way through in order to prevent any leakage.
For further tips on general bathroom tiling we’ve put together some handy tips over on
this blog.