Stylish and versatile wall panelling system to complement your bathroom tiles
Showerwall bathroom wall panels
Available to order from CTD tile showrooms nationwide
If you're looking for durable, easy to fit bathroom wall panelling to accompany your new bathroom tiles, the Showerwall range of waterproof shower panels could be for you.
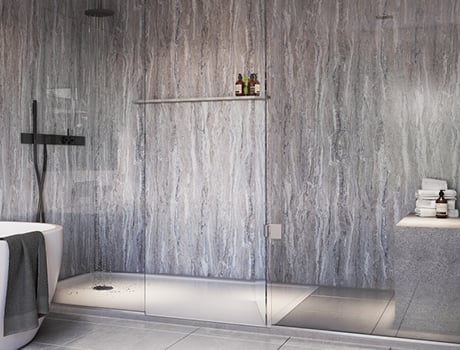
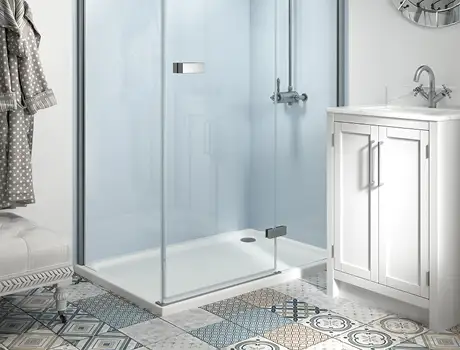
Available in a wide variety of designs, colours, finishes and sizes to suit every bathroom, Showerwall has a moisture resistant MDF core and a high-pressure laminate backing offering a seamless, watertight finish that's hard-wearing, stain resistant and totally hygienic. Ideal for use as wet room wall panels and bathroom splashback panels, Showerwall comes with the peace of mind of a 15 year guarantee when you register your product after installation.
Benefits of using Showerwall panels
- Ideal accompaniment to tiles
- Seamless walls
- Easy to clean
- Easy to install
- Waterproof finish
- Wide choice of designs
- 15 Year Guarantee
Find your nearest CTD shower panel stockist
Ready to discover more? We're here to help!
Pop into your local CTD tile showroom where you can view the full collection of Showerwall panels, pick up a brochure, collect free samples and discover the perfect tiles to accompany your wall panels.
Go to a showroom near you!
View the Showerwall Gallery
With over 80 designs to choose from!
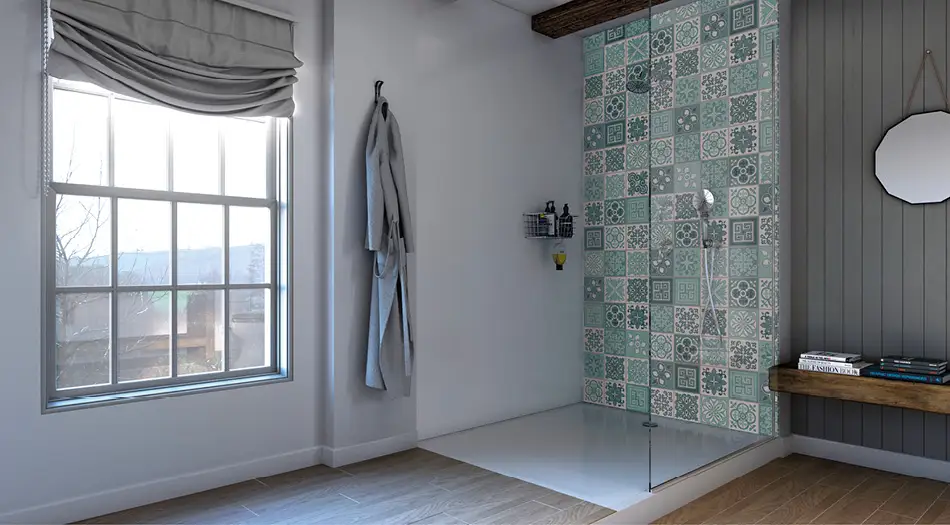
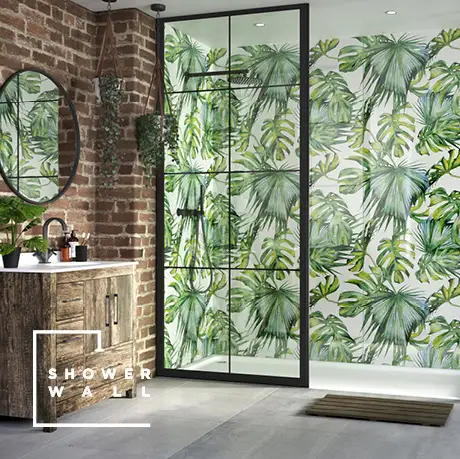
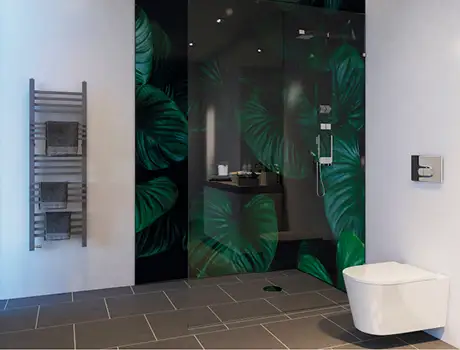
Browse through a selection of Showerwall designs below to find your ideal waterproof wall panels for bathrooms and shower rooms. From colourful acrylic shower panels to marble and stone effects, there are plenty of options available. For a truly bespoke design solution, you can even have your shower wall panels made in your own chosen theme - ask our team in-store for more information.
Acrylic Collection
Custom Collection
Marble Collection
Mineral Collection
Quarry Collection
Pair your Showerwall panels with tiles for the ideal combination
Complete the look and create that all important Wow factor!
There is plenty of choice when it comes to designing your bathroom or shower room, so we have given a few helpful tips below as a guide. Call into your local CTD tile showroom for even more advice and view samples of Showerwall panels and tiles side by side.
Plain Floor Tiles
If you're considering making a bold feature of your shower wall panels, opt for plain tiles throughout the rest of your bathroom or wet room.
Shop the collection →
Wood Effect Floor Tiles
Wood effect floor tiles are a perfect accompaniment to patterned or marble effect shower panels, bringing the beauty of the natural world into your interior.
Shop the collection →
Natural Stone Effect Floor Tiles
If stone effect panelling is the look for you, we have an inspirational range of natural stone effect tiles to complement your Showerwall panels.
Shop the collection →
Patterned Floor Tiles
You might be considering going for a beautifully simple shower wall panel in a neutral tone. Pair with patterned floor tiles for an eyecatching finish.
Shop the collection →
Guide To Installing Showerwall
Discover how to fit shower wall panels in our helpful video guide
Showerwall can be fitted by anyone who is DIY competent. Simply cut the Showerwall panels to size and fix them to the wall or over existing tiles. Please ensure that you have a copy of the Showerwall HPL Installation Guide to hand during the fitting process to refer to at every stage.
Showerwall's HPL panels are surfaced in high pressure decorative laminate which offers high performance and durability. Installation is made easy with Showerwall's unique Proclick technology which locks the panels together with no trims required. The video shows standard installation of HPL panels over a bath. If you have specifics about fitting this in your bathroom, please call or ask in-store – we would be happy to help.
*Ensure panels are stored flat prior to fitting
Tools Required
Tape Measure
1200mm Spirit Level
Utility Knife
Masking Tape
Pencil or Marker
Hacksaw
Mitre Block
Drill
Handsaw/Jigsaw/Circular Saw
Sealant Gun
Suction Cups
Ear Protection
Installation Steps
Step 1: Preparation
The wall panels can be fixed to an existing wall or directly over tiles providing the surface is flat and plumb. It is also essential that the walls are free from dust and grease. Clean down any surfaces and wait until completely dry. If the walls are not flat, then treated battens must be used to install the panels.
Step 2: Measure and fit Sureseal Strips
First, ensure walls and bath are level. Then measure around the length and width of the bath for the Sureseal strips to be fitted. Showerwall's Sureseal is a three-part system and provides a watertight finish at the base of the panel. It consists of a PVC strip and Showerwall sealant. Using the mitre box provided from the Showerwall installation kit, insert the Sureseal strip, complete with face cap and cut the required 45 degree internal corner angle. Notch both ends to accommodate the internal corner with a hacksaw. Check the mitre cuts and notches match up and mark with a pencil as a guide. Apply Showerwall sealant into the underside channel of the Sureseal strip, making sure the cavity is totally filled. Lay a straight line of Showerwall sealant on the bath or shower tray and on the mitred joint to fuse together and nail to the wall.
Step 3: Cutting shower wall panels
Showerwall panels will often require cutting before installation so ensure the cutting line is measured and marked before any alterations. Measure the height required and cut the panel to fit, a 3mm gap is left at the top edge of the panel and around any cut outs. Any holes for pipes or showerheads should also be made at this point. Remove the protective film from the panel and cut with the décor side up to avoid chipping, you can do this using a handsaw, jigsaw or circular saw. Fix the corner trim to the wall using Showerwall adhesive and ensure this is level. Measure the width of the wall allowing for a 15mm gap for the corner trim, then cut accordingly. Fit the endcap to the panel using sealant.
Step 4: Fitting first panel
Apply sealant to the Sureseal strip and corner trim. Apply 6mm lines of adhesive to the walls, evenly spaced in waves or zig-zag patterns. Place the bottom edge of the panel so that it's sitting on the sealant of the Sureseal strip. Then position the first panel into the corner trim.
Step 5: Continue fitting panels
Panel 2: Cut the panel, removing the tongue edge to fit into the corner trim. Then cut the panel to the required height. Repeat step 4 – adding sealant to the Sureseal strip and corner, and adhesive to the walls. Use suction cups to help position your panel in place and guide neatly into the corner trim.
Panel 3: Measure from the edge of panel 2 to the wall remember to remove 15mm to allocate space for the corner trim. Make sure that the measurement is taken from the panel edge and not the tongue profile. Cut the panel to fit, then fix the corner trim to the cut panel edge using sealant. Then add a small bead of sealant to the tongue edge and place into the groove edge of panel 2 at an angle. From here you will be able to pivot the panel towards the wall and fix. Wipe away any excess sealant.
Panel 4: Cut your final panel to size and attach the endcap with sealant. Repeat step 4 and place the panel into the corner trim before pressing firmly and fixing to the wall.
Step 6: Sealing and Setting
Finally, you will need to seal the expansion gap at the ceiling edge to ensure its water-tight and leave for 24 hours for the sealant and adhesive to set before it is ready to use. Once complete you will have a 100% water tight system with a 15 year guarantee.